Adding a Touchscreen Display to an 8051 Microcontroller
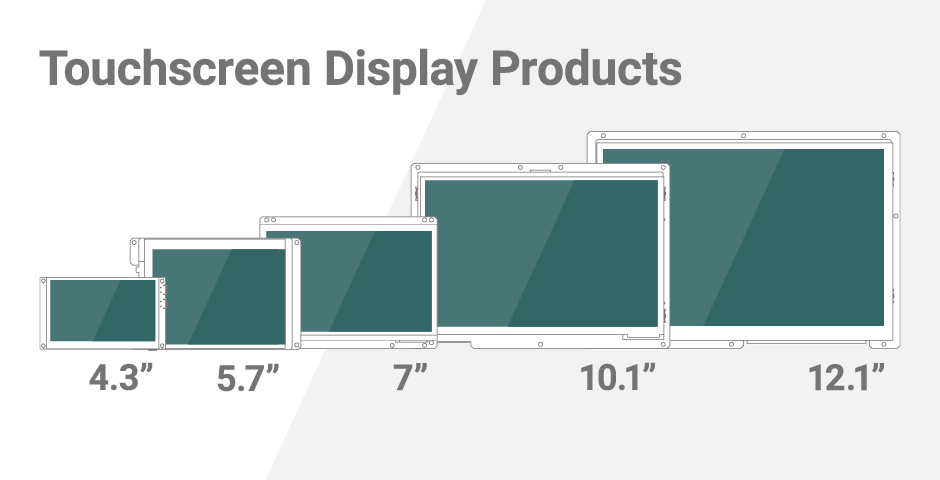
If you are looking to send and receive information between your system’s 8051 microcontroller and a touchscreen, Reach Technology touchscreen display modules give you a jump start. Connect to the serial LCD controller via a standard asynchronous serial port. Use simple ASCII commands to draw images, text, controls, and other interface elements. Controls report back over the serial line when activated or changed. Images are stored on the embedded display’s SLCD controller board in flash memory.
If you are trying to add a stand-alone LCD to an 8051 microcontroller, we recommend contacting the following display manufacturers directly to see if they can help you with your application: Innolux, NEC, Evervision, Hitachi, Interactive Display Solutions (IDS), Fema Electronics, and Ampire.
Engineers tell us that getting a touchscreen display up and running from scratch is time-consuming and expensive. A steep learning curve takes their focus away from their core competencies, and little changes cause big problems related to maintaining the solution over time. The risk of higher development costs, missed production targets, and maintenance headaches causes them to look for something other than a home-grown solution whose steps are outlined in the general guide below. Learn more about buying vs. building here.
Ask an Engineer
Call 503-675-6464 and talk directly to an engineer to get your questions answered or fill out a form to get suggestions on which modules will work best for your project.
Consider Using a Reach Technology Development Kit to Get Started
Instead of building a 8051 Microcontroller solution on thier own, hundreds of companies have chosen to start with our development kits. They start at $399 and include hardware, software, documentation, and support. Development Kits come in various sizes and development environments and include everything you need to create a prototype quickly. When you are ready, move smoothly into production with off-the-shelf display modules that offer 5-7 years of availability as a minimum.
If you are looking for a way to send and receive information between your system’s 8051 microcontroller, Reach Technology display modules give you a jump start. Connect to a serial LCD controller via a standard asynchronous serial port. Use simple ASCII commands to draw images, text, controls, and other interface elements. Controls report back over the serial line when activated or changed. Images are stored on the embedded display’s SLCD controller board in flash memory. Compare modules or get started with a development kit.
If you are simply trying to add a stand-alone LCD to an 8051 microcontroller, we are not a fit. We do not manufacture and sell individual display panels or LCDs alone — we sell modules. We recommend you contact one of the following display manufacturers directly to see if they can help you with your application: Innolux, NEC, Evervision, Hitachi, Interactive Display Solutions (IDS), Fema Electronics, and Ampire.
Engineers tell us that getting a touchscreen display up and running from scratch is time-consuming and expensive. A steep learning curve takes their focus away from their core competencies, and little changes cause big problems related to maintaining the solution over time. The risk of higher development costs, missed production targets, and maintenance headaches causes them to look for something other than a home-grown solution whose steps are outlined in the general guide below. Learn more about buying vs. building here.
What You Get When You Work with Us
Path to Add a Touchscreen to 8051 Microcontroller on Your Own
Components Needed
- 8051 Microcontroller: Choose an 8051 microcontroller with sufficient I/O pins and processing power for your application.
- Touchscreen Display Module: Select a touchscreen display module that is compatible with the 8051 microcontroller. The display module should come with its own documentation specifying communication protocols and pin configurations.
- Touchscreen Controller: Some touchscreen displays come with a separate touchscreen controller. Ensure compatibility and check the communication interface (SPI, I2C, etc.).
- Power Supply: Provide a stable power supply for both the microcontroller and the display module.
Steps
- Understand Display Module Specifications: Read the datasheet and documentation of your touchscreen display module to understand its pinout, communication protocol, resolution, and any special requirements.
- Connect Power Supply: Connect the power supply to the display module, ensuring it operates within the specified voltage range.
- Connect Microcontroller to Display Module: Connect the microcontroller to the display module. This involves connecting data lines, control lines, and any other required lines based on the communication protocol (SPI, I2C, parallel interface, etc.).
- Connect Touchscreen Controller: If your touchscreen display has a separate touchscreen controller, connect it to the microcontroller using the appropriate communication interface.
- Write Display Driver Code: Write code for the microcontroller to communicate with the display module. This involves initializing the display, sending commands and data, and managing the display’s functionality.
- Write Touchscreen Driver Code: If your display has a touchscreen, write code to handle touchscreen input. This may involve reading touch coordinates and responding to touch events.
- Test Display and Touchscreen Functionality: Implement a simple program to test basic display functionality. Ensure that the microcontroller can communicate with the display module and display content.
- Implement Touchscreen Interactivity: Implement code to handle touchscreen input. This might involve detecting touch events, calibrating the touchscreen, and responding to user input.
- Integrate with Application Code: Integrate the display and touchscreen functionality into your overall application code. This may involve displaying specific information, graphics, or user interface elements.
- Optimize and Debug: Optimize your code for performance and memory usage. Debug and test thoroughly to identify and resolve any issues.
Considerations
- Communication Protocols: Ensure the communication protocols (SPI, I2C, etc.) between the microcontroller and the display module are correctly implemented.
- Memory and Processing Power: The 8051 has limited resources compared to more modern microcontrollers. Optimize your code to fit within the constraints of the 8051’s memory and processing capabilities.
- Touchscreen Calibration: Implement touchscreen calibration routines to ensure accurate touch input.
- Documentation: Refer to the documentation provided by the display module manufacturer for specific details and considerations.
Always consult the datasheets and documentation of the components you are using, and be prepared to troubleshoot and iterate on your design. Additionally, consider using development tools and software libraries that may simplify the integration process.
Or, skip all these steps and get started with a Reach Technology touchscreen development kit.
More Reasons to Use a Reach Technology Display Module
Choose Between Two Development Environments
Get Started with a Touchscreen Development Kit
3,500+ kits sold to date. 100% Satisfaction Guarantee.
Embedded Touchscreens Made Easy:
Up in Days, Smoothly to Production. Get started with a Development Kit.
Reach Technology is now a part of Novanta.
Sales and Engineering
545 First Street
Lake Oswego, OR 97034
503-675-6464
sales@reachtech.com
techsupport@reachtech.com
Manufacturing
4600 Campus Place
Mukilteo, WA 98275
service@reachtech.com
Please send payments to:
Novanta Corporation
PO Box 15905
Chicago, IL 60693
accounts.receivable
@novanta.com


